Creating Geofences
As noted in the introduction to Geofences, you do not need any job sites set up in order to take advantage of using Geofences. This article shows you how to create a new custom Geofence in InfoHub.
Create a Geofence
1. Within Geofences, select Create from the Geofence Tools.
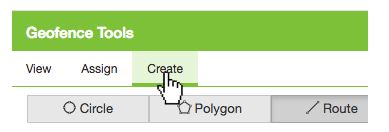
2. Choose the Type
Circle - Click on the map to place a central point, then click again to set the outer radius.
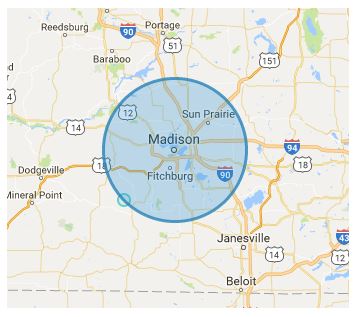

Alternatively, click on the map to place the central point and type a number in the Geofence Tools panel to create a circle that is exactly the radius specified. Select the Draw button to see the size update on the map.
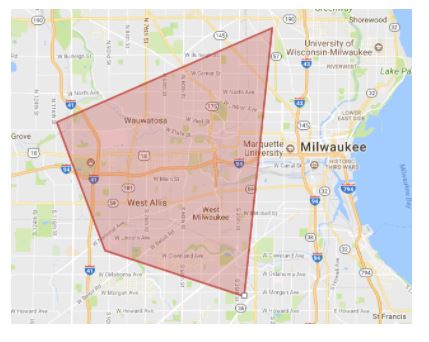
Polygon - Click the map to beginning drawing. Each time you click the map a straight line will connect the points to make a shape in red as shown. Finish drawing by double clicking the last marker. Once finished, the polygon color will turn blue.
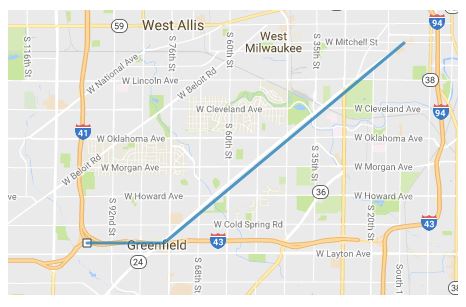
Route - A route is a linear geofence. Click on map to start drawing. Keep clicking the map to define route. Double click on the end of the route to finish drawing. While drawing a route, the line will appear in red. Once finished, the line color will change to blue.
3. After creating the Geofence and finishing the drawing, select Save![]() The Geofence Editor will appear, where you can finalize details of your drawing.
The Geofence Editor will appear, where you can finalize details of your drawing.
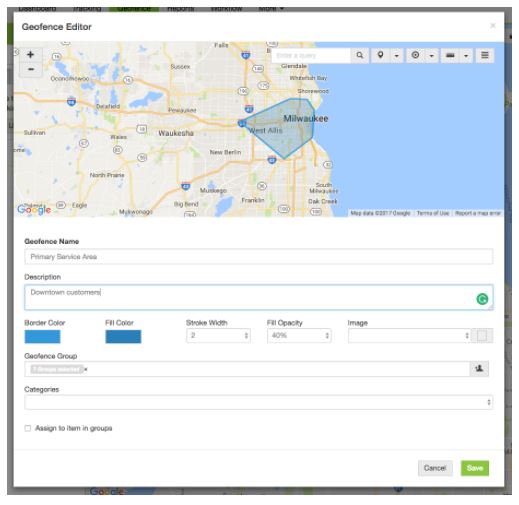
4. Enter the Geofence Name
5. You can also customize your geofence by adding a description, choosing a color for the inner fill, adding a border, border stroke width, and opacity.
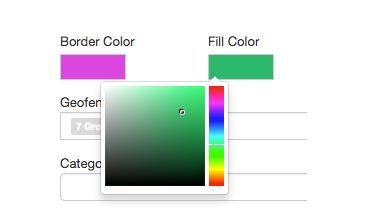
Note: If you change the color of a geofence in the editor, these changes will take effect once saved and the page is refreshed. The icon in the Geofence list in View mode will match the color of the Fill for your Geofence.
6. A Geofence will be automatically Assigned to all crew groups within InfoHub. To change which groups are assigned to a new geofence, choose the Add Group ![]() icon.
icon.
7. Select the checkbox for Assign to item in groups. More options become available.
8. Specify the trigger Action, Time In/Out, Speed, Days, Start and End Time for monitoring this Geofence.

Actions
The actions refer to triggers relating to a geofence. Options are:

9. When the geofence is configured, choose Save to apply it.
Once the Geofence is saved, select View to see it in the list and update the map accordingly.
Note: By saving the settings, all existing Geofence assignments will be overwritten.
Helpful Ideas for Using Geofences
Show Job Sites on the map by selecting the waypoint icon ![]() within Geofence Map Tools. This can be helpful for creating an accurate geofence that includes all your customers.
within Geofence Map Tools. This can be helpful for creating an accurate geofence that includes all your customers.
Build a Geofence around your office location and create a Geofence Entry/Exit Report to know exactly when crews come and go. Compare to time cards to learn who is getting started right away each morning and who may be hanging around at the office not working.
Do you have a way to take advantage of Geofences in InfoHub? We’d love to hear how you are using the system. Send us a message through our secure online form or email InfoHub Support at infohub@basco.com.