Routes from Templates
InfoHub also helps you speed up creating new routes through the route template feature. Every time you create a route, it becomes a template and a starting point for similar routes in the future.
Build a Route from a Template:
1. Go to Workflow by selecting it from the Main Menu.
2. Select the dropdown arrow next to Add Route. Choose to From Template.

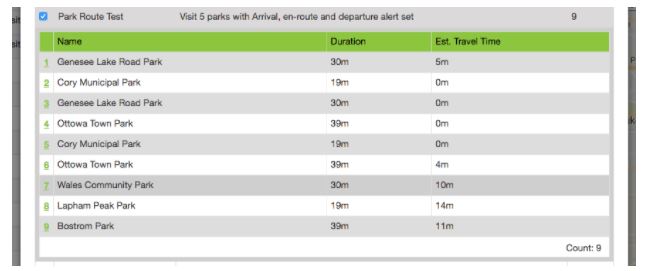
3. In the window that appears, a list of all available routes can be selected. Pick the route checkbox to see all job sites within this route.

4. Select Next.
The Route Editor will appear and you can change details of the route just like in creating a new route or editing an existing route.
Here are a few tips when working with the route editor:
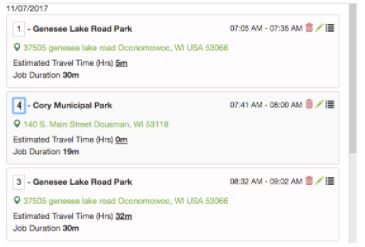
Reorder the jobs in the list by selecting the job and dragging to a different position within the list. You can also reorder by typing a different number into the position field.

The image above shows reordering job sites within the route by typing in a new position.
The Route Editor will refresh to show the Job Sites you have included in this route. You can Reorder the listed job sites by selecting and dragging the job up or down in the list.
The Map and Route Details are useful to guide your route ordering decisions. A route that is easy to navigate will help your crews understand where to go and reduce windshield time.
Print routes and share them with crews to ensure they understand their schedule and can see the Job Site addresses and expected time of arrival.
Be sure to account for Travel Time when planning routes based on other existing templates. We recommend allowing at least 10 minutes between all job sites in a workflow route. As manager of your crews, it’s important to adjust travel times for routes to improve your job site efficiency and Arrival/Departure Reports over time.
Give routes created from existing templates a different name from the original. This will avoid confusion and unnecessary duplicates in the Workflow route list.
Change the route name by selecting the pencil icon ![]() next to the map within the Route Editor.
next to the map within the Route Editor.

Editing the basic route details also will display options to update the Estimated Start Time and Description. Be sure to Save changes before closing.
Did you know that Workflow Routes are used to keep your customers informed of your crew's whereabouts. Read our guide on Customer Notifications to see how it works.